
YOUR GUIDE TO INSTALLATION
LANDSCAPE INSTALLATION
|
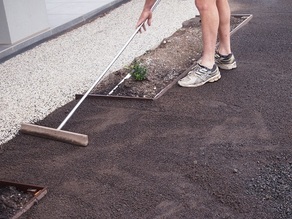
Clear the site of existing debris such as sod and rocks and then level ground. A minimum depth of 80mm crushed rock should then be spread as evenly as possible and compacted using a vibratory compactor. A 20mm layer of crusher dust is then added and compact again. Allow a fall for excess water to penetrate through the turf and drain. When compacting continue to add water.
This will create a firm base. |
|
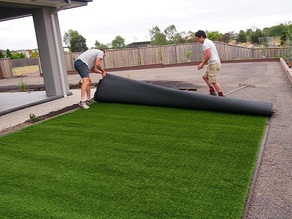
Grass is then rolled out over prepared base. Ensure the grass is all laying in the same direction (grass is directional, direction can be determined by stitching on the back.
|
|
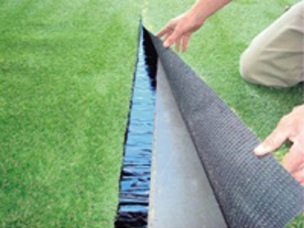
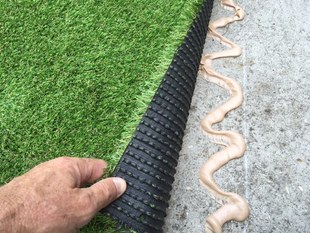
Joining tape is used where two pieces of artificial turf require joining together. The joining tape must be cut for the length of the join and placed under the proposed join. Once the joining tape is applied the synthetic grass can be joined in a hidden and seamless manner. Joining tape comes in 10mt rolls.
|
|
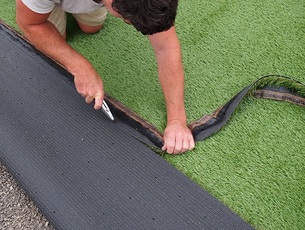
Grass can be easily trimmed with a Stanley knife or similar through the backing of the grass.
|
|
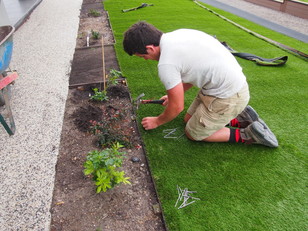
100 - 150mm flat head nails are used to secure the synthetic grass to the ground. It is recommended that the turf pegs be placed approximately 1 per meter around the perimeter and along joins where required.
|
|
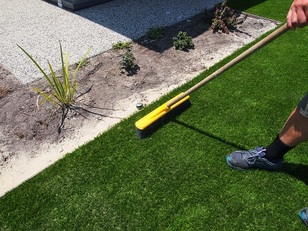
We recommend applying 5kg of sand per square meter of artificial turf. The sand provides the foundation for the synthetic grass, withstanding normal traffic as well as giving the grass the spring to come upright after being walked upon by people and animals.
|
INSTALLATION ONTO CONCRETE
|
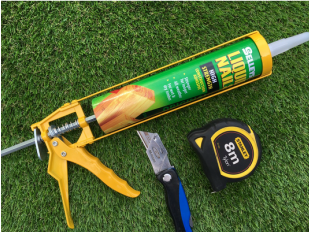
Gather required tools. Liquid Nails, Knife & Tape Measure.
|
|
Place adhesive along one side and stick turf to concrete.
|
|
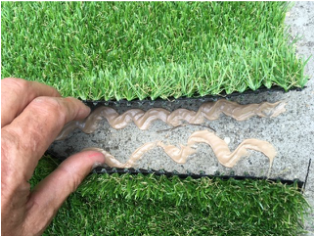
Where a join is required to be glued, lay grass, separate both sides and apply adhesive to concrete. Lay turf evenly and butt joins for a smooth finish.
|
|
Smooth grass down to ensure a great finish with no visible join lines.
|